
the cropping tool
Do you have a picture of you and your significant other standing near the Eiffel Tower, but you suddenly break up with them and you need their sorry cheating butt out of the picture? The Cropping tool is just what you need.

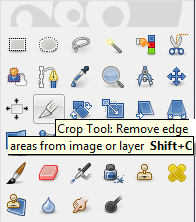
First of all, you obviously need to select the tool itself.
This can be done simply by clicking the Box Cutter/ Exacto Knife in the Toolbox
or
SHIFT+C
This can be done simply by clicking the Box Cutter/ Exacto Knife in the Toolbox
or
SHIFT+C
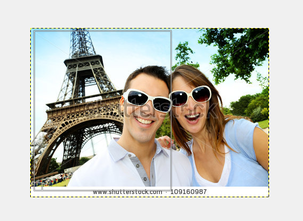
Select the general area which you would like to keep by clicking and holding
left mouse button at one corner, and dragging it to the other. Let go of the mouse button once you are satisfied.
We can fine tune the edges in the next step.
left mouse button at one corner, and dragging it to the other. Let go of the mouse button once you are satisfied.
We can fine tune the edges in the next step.
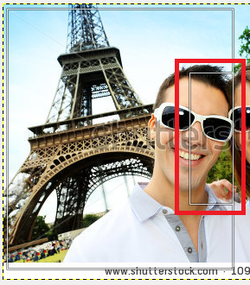
Using the little rectangles that appear on the edges of the crop frame when you hover near its general location, fine tune the edges of the picture. The innards of the grey rectangles are what you will end up with.

Press Enter.
Voila! You're now single.
Voila! You're now single.
The Rotate tool
The Rotate Tool is used to.... Well, rotate pictures. If you have a camera that takes better pictures landscape but you need a portrait, it's a good idea to flip the picture right side up.

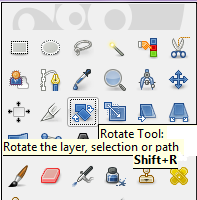
Again with this tool, I know it's difficult, but you need to select the tool. Might take a while, but you can do it!.
You can select the Rotate Tool by clicking the blue rectangle that... rotates.
or
Press SHIFT+R
You can select the Rotate Tool by clicking the blue rectangle that... rotates.
or
Press SHIFT+R
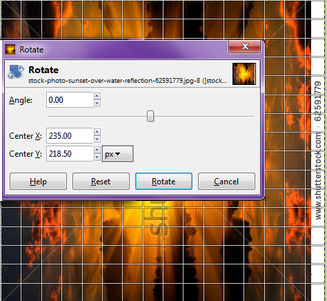
After selecting the tool, click anywhere on your image to open up the dialog box.

Enter the number 90 or 180 into the "Angle" box, depending on how much you want to flip the image. I chose 90 for this tutorial. Press Rotate.
Tada!
Note: Other images you may encounter in the future might require a specific angle other than just rotating it sideways. In this case, the grid pattern on the image itself rotates, so you can get the perfect angle yourself.
Also, if you so desire, you can crop the alpha channel off the sides if your picture wasn't square.
THE CLONING TOOL
The cloning tool can be used in many situations. Most prominently, it is used in scenarios where you need to get rid of an unsightly disturbance in your images. Like power lines in your picture of a cathedral, zits on a face, of a dog pooping in the background of your only wedding photo that isn't blurry.

Zoom into the target as necessary using the zoom tool.
Even if it's TOO necessary.
Even if it's TOO necessary.
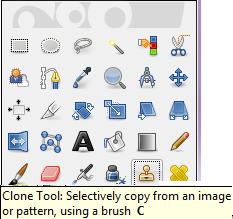
I know it's incredibly difficult and I hate to ask this of you, but would you now please select the Clone Tool in the Toolbox Menu. It looks like a stamp, thank you.
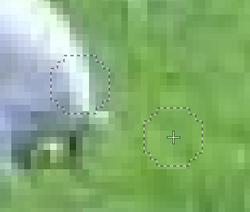
Press and Hold the CTRL button.
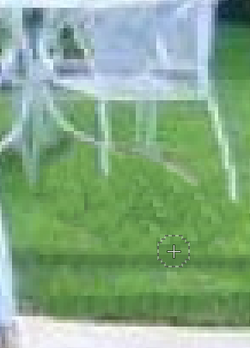
Select the piece of the image, using the left mouse button, that you would like to recreate to mask the disturbance, stop pressing CTRL. (circle with + in it in the selected area)
Select the piece of the image, using the left mouse button, that you would like to recreate to mask the disturbance, stop pressing CTRL. (circle with + in it in the selected area)
Begin roughly covering the disturbance by clicking and dragging the left mouse button over it.
Fine tune the surrounding area using the same steps as above. It doesn't need to be perfect, since no one will be looking to see if you covered up a pooping dog anyways.
Voila. Now, if only picking up dog poop at the park were this easy.
Voila. Now, if only picking up dog poop at the park were this easy.
